Lesson 4. How to get an OAuth token
In this lesson, you will learn more about OAuth tokens, how to get them and use them.
From the previous lessons, you already know that Yandex Direct API uses OAuth authorization. Remember that you must specify your OAuth token in every API request. The token encrypts information both about the app and user. The token is used to determine: which Yandex Direct user the app is acting on behalf of; whether that user has authorized the app to access their data; and whether the user has the necessary permissions to access the requested advertising and promotional content.
Hence, when accessing Yandex Direct via the API, you do not need to pass the user account password. It is sufficient to pass the OAuth token: it makes the interaction with the Yandex Direct API more secure. However, it is important to keep in mind that you need to get a separate token for each user of your app.
At the initial stages of app development, you only need to manually obtain a so-called debugging token. Later, when you roll out your app into production, you should implement a user-friendly way to get a token from within the app: the user clicks Allow in the Yandex OAuth web interface, and Yandex OAuth returns the token to your app automatically.
Please note that the manually obtained token is in no way different from the automatically obtained one. The token allows you to manage the user's actual advertising and promotional content, regardless of how the token was obtained.
How to get an OAuth token manually
In the previous lesson, you registered your app on Yandex OAuth, adding the development URL to the Callback URI #1 field. If you haven't done so (by leaving the field blank or entering a different value), go to Yandex OAuth (https://oauth.yandex.ru/) and edit the app settings: select the Web services checkbox, click the Set URL for development, and save the changes. Now you can manually get a token for the test user.
As a test user, you can use the same developer account you have used to register your app and apply for access. We'll focus on this very option in this tutorial.
To get a token manually, follow these steps:
-
Log in to Yandex with your username.
-
Follow link
https://oauth.yandex.ru/authorize?response_type=token&client_id=APPLICATION_ID(put your app identifier instead of
APP_ID). -
On the page that opens, click Allow.
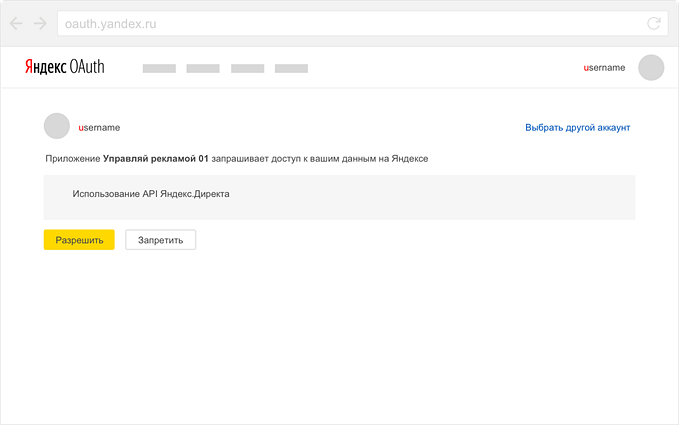
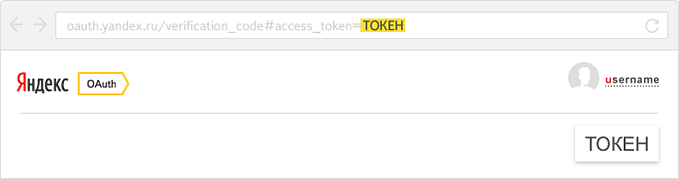
-
Yandex OAuth redirects you to the page displaying the token. The token is also added to the URL shown in the address bar. Copy the token to use it in your API requests.
Alert
- Do not share the token with anyone: one can use it to access the user's data in Yandex Direct.
- You can create a separate test user account (or multiple accounts). For a new user, you must create an account in the Yandex Direct web interface, having selected the country and payment currency, and accepted the user agreement in the API section. To get a token for the user, log in to Yandex using their username and repeat the above procedure.
Tip
If you couldn't get a token for some reason, follow the detailed instructions.
Why can the OAuth token stop working
The token may expire over time, so you may need to get a new one.
All the user's tokens are revoked if:
- the user has changed their Yandex password
- the user clicked the Log out of all computers link.
A token issued for a specific app is revoked when:
- The user revokes the app's access to their data (this feature is available in the Yandex ID web interface).
- The app developer changes access permissions for the app.
- The token expires.
For the full list of situations when Yandex OAuth revokes tokens, see the Yandex OAuth documentation.
What's next
So you have received a token you can use to make the API requests. The last preparation stage is ahead: create and configure Sandbox, a test environment for app debugging. Then we will proceed directly to making API requests.
Useful links
Yandex OAuth documentation: