Instant authorization setup
-
Configure the page of your website where the widget or button will enable the user to log in.
-
Link the
sdk-suggest.jsscript to the page:<head> <script src="https://yastatic.net/s3/passport-sdk/autofill/v1/sdk-suggest-with-polyfills-latest.js"></script> </head> -
Call the script. The code depends on the authorization component you select: the group of parameters determining the button's appearance is excluded for the widget.
Instant login widgetLogin button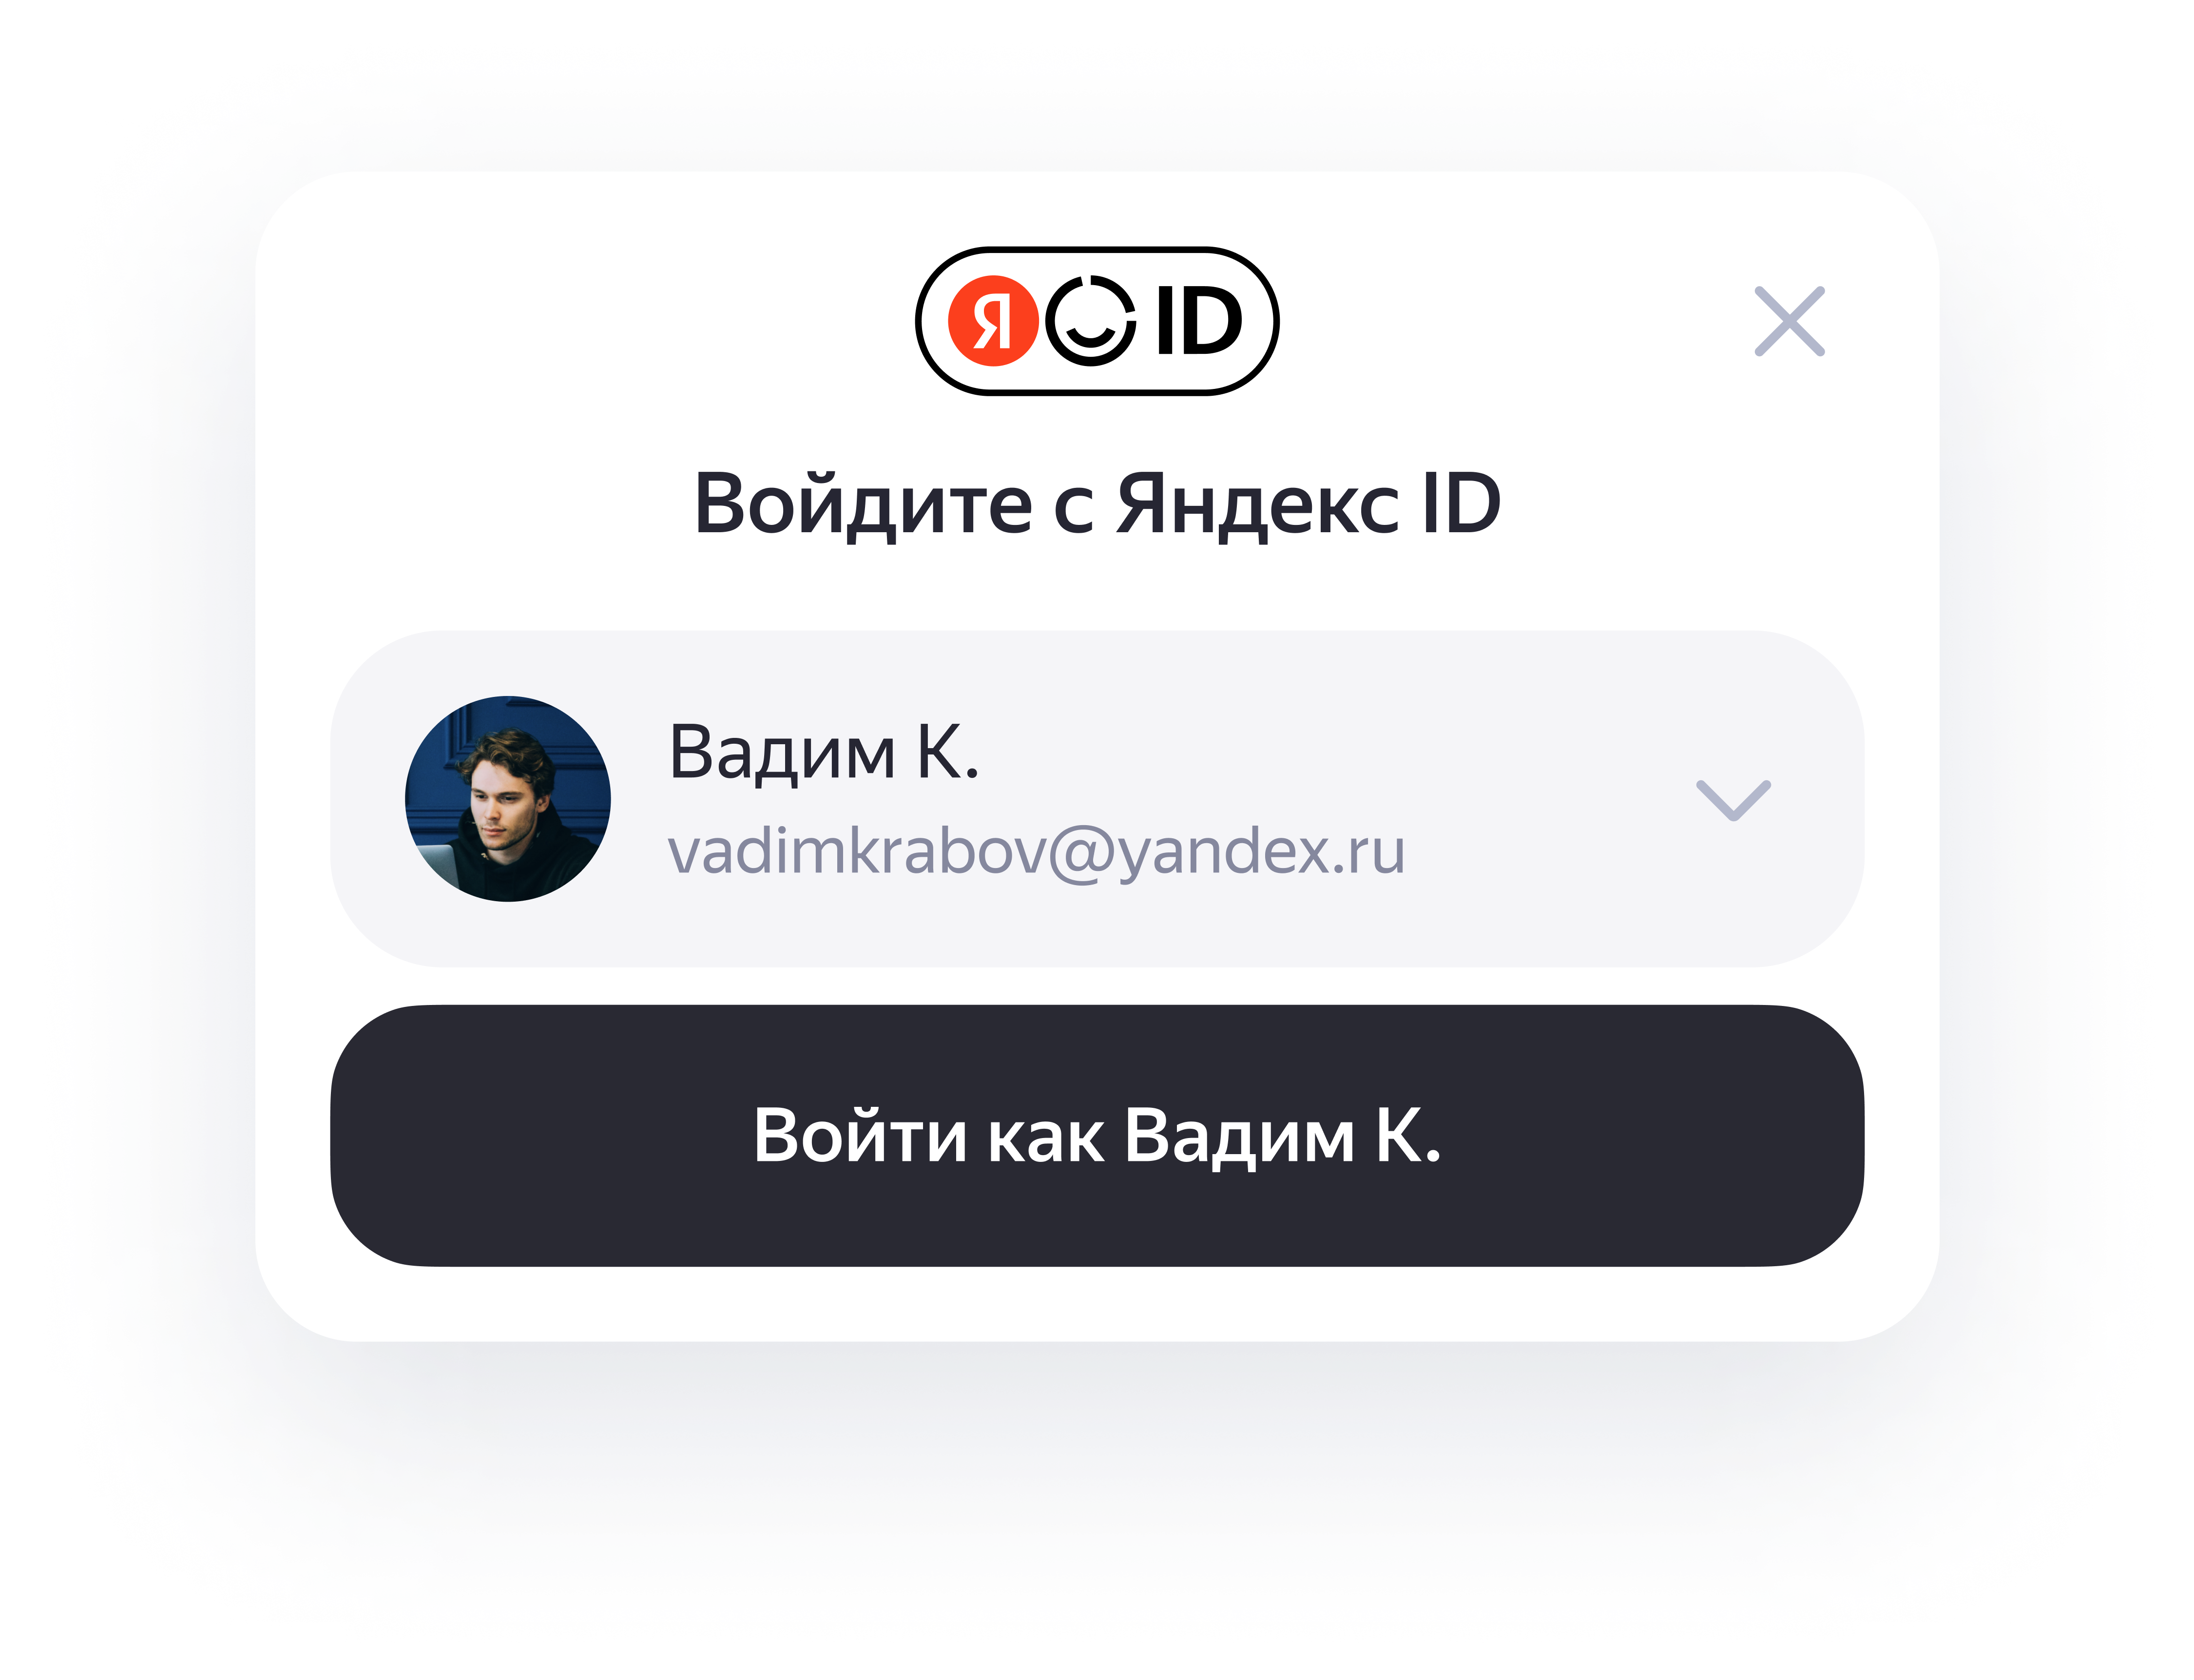
-
Copy this code:
YaAuthSuggest.init( { client_id: 'c46f0c53093440c39f12eff95a9f2f93', response_type: 'token', redirect_uri: 'https://examplesite.com/suggest/token' }, 'https://examplesite.com' ) .then(({ handler }) => handler()) .then(data => console.log('Message with a token', data)) .catch(error => console.log('Error handling', error)); -
In the code, substitute:
- The
client_idvalue with the ID of the OAuth app registered in Step 1. - The
redirect_urivalue with the URL of the auxiliary page you entered in the Redirect URI field for the OAuth app that has thisclient_id(if you don't specify any URL, the first value from the Redirect URI field will be used). 'https://examplesite.com'with the "origin" of the auxiliary page that receives the token.
- The
-
Use the button generator to customize the button's appearance.
-
Copy the generated code and paste it into the page.
-
In the code, substitute:
-
oauthQueryParamswith the strings below.{ client_id: 'c46f0c53093440c39f12eff95a9f2f93', response_type: 'token', redirect_uri: 'https://examplesite.com/suggest/token' }Use the following parameter values in these strings:
- For
client_id— the ID of the OAuth app registered in Step 1. - The
redirect_urivalue with the URL of the auxiliary page you entered in the Redirect URI field for the OAuth app that has thisclient_id(if you don't specify any URL, the first value from the Redirect URI field will be used).
- For
-
tokenPageOriginwith the "origin" of the callback page that receives the token.
-
See Set up the sdk-suggest.js script for the authorization page to learn more about the
sdk-suggest.jsscript. -
-
-
Prepare an auxiliary page that will receive the OAuth token.
-
Create a blank page at the address you entered in the Redirect URI field for the OAuth app registered in Step 1. You don't have to style the auxiliary page. It will only be displayed for a few milliseconds, so you can leave it blank.
-
Link the
sdk-suggest-token.jsscript to the page:<head> <script src="https://yastatic.net/s3/passport-sdk/autofill/v1/sdk-suggest-token-with-polyfills-latest.js"></script> </head> -
Call the script.
-
Copy this code:
YaSendSuggestToken( 'https://examplesite.com',{ flag: true } ) -
Replace
'https://examplesite.com'in the code with the "origin" of your website's page where the widget or button will enable the user to log in.
-
See Set up the sdk-suggest-token.js script for the callback page to learn more about the
sdk-suggest-token.jsscript. -