Add a comment to a Tracker issue
Set up an integration with Tracker to add a comment to an existing Tracker issue after a user submits a form. For example, you can collect additional details about a request in a form and add them to a Tracker issue.
The comment is added on behalf of the user who submitted the form if they have access to Tracker and permission to comment on the specified issue.
Only Yandex Forms for Business users can set up comment creation.
Set up comment creation
-
Select a form and open the Integration tab.
-
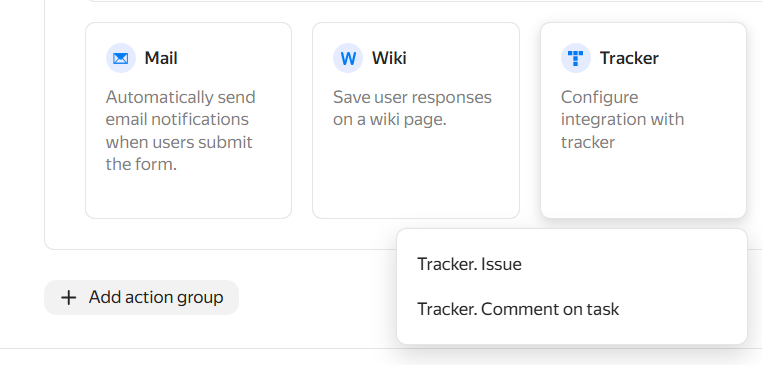
Select an action group where you want to set up comment creation. At the bottom of the group, click Tracker and select Tracker. Comment on task.
-
In the Task field, specify the key of the issue where you want to add a comment:
-
Enter the issue key manually, for example,
MYQUEUE-123. Comments from all form submissions will be added to this issue. -
To let users specify the issue themselves, add the Answer to question variable for a Short text or Tracker issue suggest question.
-
If the form is embedded in a Tracker issue comment, add the Ticket code variable. The issue key will then be passed to the form automatically.
-
-
In the Comment text field, enter the comment text. To add an answer to a question or other form data, click and select a variable.
-
If the user must receive a link to the added comment, select Show in the Show messages about the results of actions block.
-
Click Save.
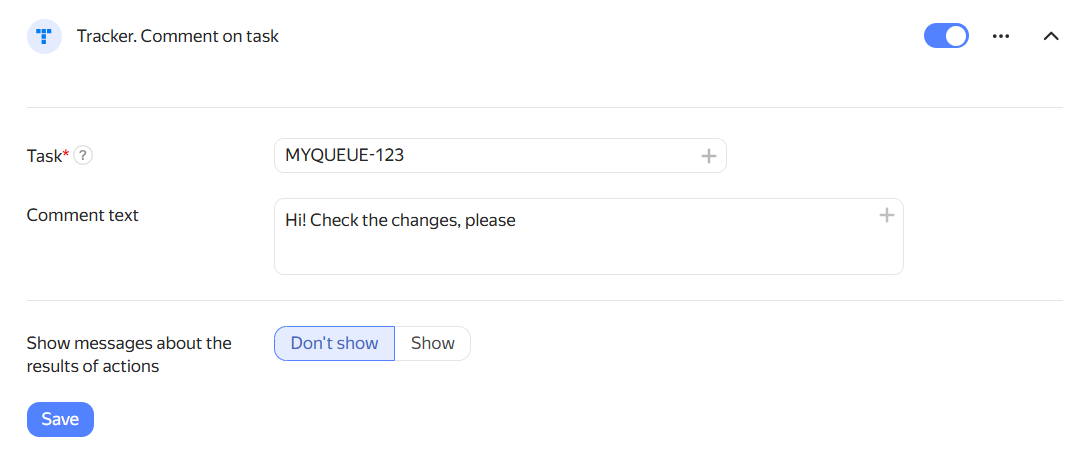
If the user has the required permissions, a comment with the specified text is added to the Tracker issue after they submit the form.
Conditions and execution history
To add comments only for specific answers to questions, set up conditions for performing actions.
The results of adding comments are displayed on the Completed integrations page.
Troubleshooting
To check for errors that occur during the form integration:
-
Open the form where the integration is incomplete or doesn't work as expected.
-
Go to the Integrations tab and click Completed integrations.
-
Check the list for error messages related to your integration.
-
After resolving the problem, try creating an issue again.
-
If the problem persists, contact support.