Getting started with Yandex Forms
Get started with Yandex Forms by creating a simple form:
Step 1. Create a form
-
Open the desired version of Yandex Forms: in the upper-left corner of the page, select Personal forms or Forms for business. To learn more about their differences, see Personal forms and forms for business.
-
On the top panel, click Create form.
-
Under Select a question, click Show all questions and arrange the questions in the following order:
No. Blocks Settings 1 
Enter text: Please fill out this sample form.
Add a comment:Required fields are marked with an asterisk.2 
Enter a question: Last name:
Select Required at the top of the question block.3 
Enter a question: Gender:
Add answers:MaleFemale
4 
Enter a question: Marital status:
Add answers:SingleMarried
5 Enter a question: Maiden name: -
Set the conditions for showing the
Maiden name
question:-
Under
Maiden name
, click . -
Add two conditions and fill in the fields as shown in the example:
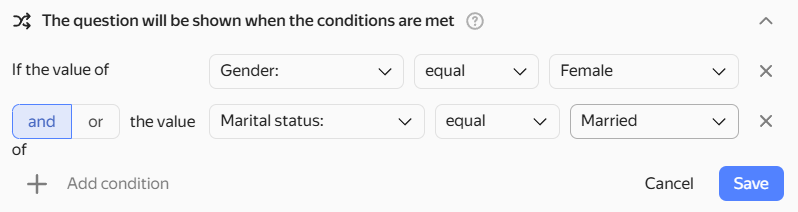
Now this question appears in the form only if the user previously selected the female gender and the
Marriedstatus. -
Step 2. Publish the form
To allow users to fill out the form, you need to publish it:
-
Click Publish.
-
To copy link to form in the Link field click .
-
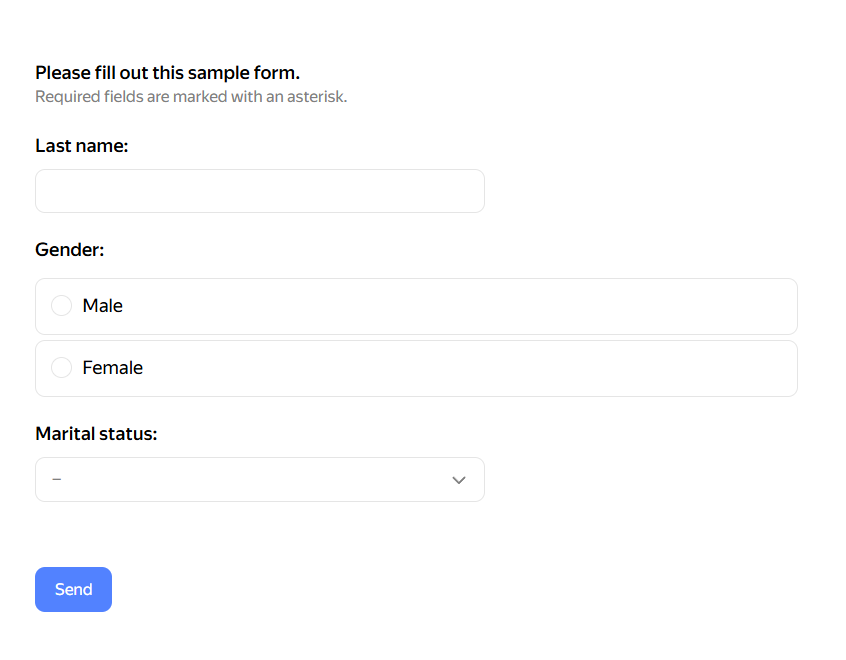
Paste the link in your browser address bar and open it. If you did everything right, the new form opens:
-
Send users a link to the form.
Step 3. Get the answers to questions
To get a table with user answers to form questions:
-
Go to the Answers tab.
-
Above the question list, select the Feed view mode.
-
Specify the period for which to export answers:
- Click All time .
- In the pop-up window, go to the Other tab.
- Select This month.
-
Specify the questions for which to export answers:
- Above the question list, click All questions.
- Keep only the Last name and Gender options selected.
-
Specify the output file format:
- Click XLSX .
- In the pop-up window, select CSV.
-
To the right of the format selection button, click Download.
Step 4. Set up access to the form
By default, only the author can edit a form. If you are using Forms for business, you can give your colleagues access to edit the form or groups of forms: Configuring access to a form.