metadata:
- property: 'og:type'
content: 'article'
- property: 'article:section'
content: 'Managing issues with an Agile board'
- property: 'og:title'
content: 'Working with issues on a board'
- property: 'article:tag'
content: 'Instructions collection'
Working with issues on a board
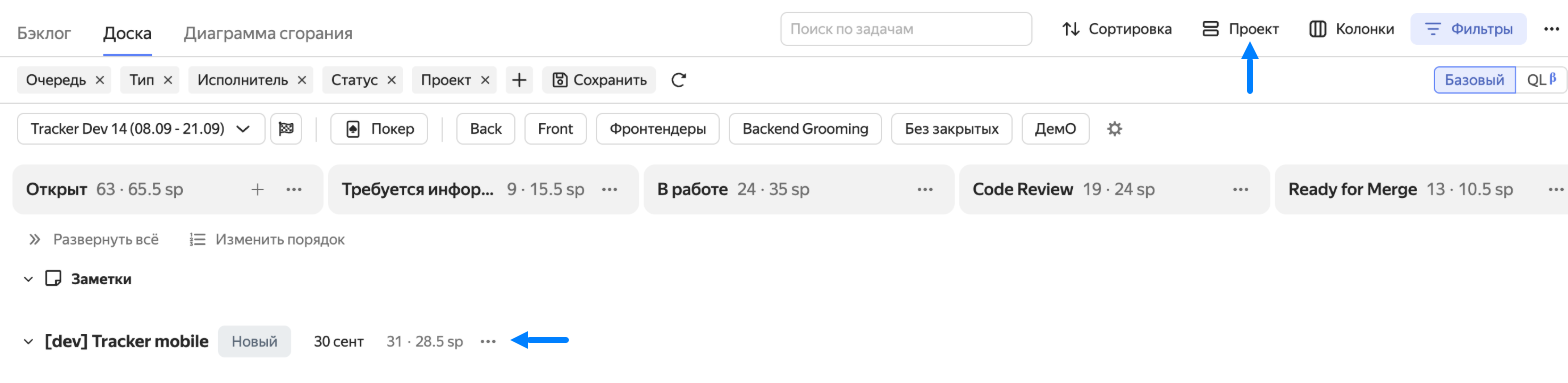
A board in Yandex Tracker is similar to a corkboard or whiteboard, divided into several vertical columns. Each column corresponds to a stage of the workflow. Issues on the board are shown as cards, analogous to paper sticky notes. The position of the cards on the board shows which issues are completed, which are behind schedule, and how much work remains:
- Issues that are not yet in progress are in the leftmost column.
- When work begins, the issue is moved to the next column, which corresponds to its execution stage. A board can have several columns, depending on the number of stages in your workflow.
- The rightmost column usually corresponds to the completion of work on the issue.
How to view issues on the board
-
To open the board page, select Boards in the left panel and then click the relevant board in the list.
-
If you use a board with sprints, click All issues on board at the top left and select the sprint whose issues you want to display.
By default, you can't view issues within a completed sprint. If you want to do this, first enable the sprint display. View completed sprints
-
Configure a convenient way to view issues on the board:
-
To change the order of issues on the board, rank them manually or enable sorting by parameters. How to sort issues on the board
-
To group issues, click No grouping at the top of the board and select a grouping parameter. How to group issues on the board
-
To show or hide issues with specific parameters, configure quick filters. How to filter issues
-
To see important issue parameters on the board, add them to the cards. How to configure issue cards
-
How to manage issues
Add issues to the board and move them between columns to visualize the current stage of each issue.
-
To make issues appear on the board, add them manually or automatically. How to add issues to a board
If the added issues are not displayed on the board, make sure their statuses are linked to the columns. To view a list of statuses that aren't used on the board, click next to the rightmost column. Configuring board columns
-
When work on an issue moves to the next stage, drag the issue card to the next column. If the issue statuses are linked to columns, the issue status will change automatically.
You cannot move a card to a column if the workflow of the queue the issue belongs to doesn't allow a transition from the current status to the new one. How to configure transitions between statuses
-
You can rank issues within a column, for example, by placing more important tasks at the top. To do this, drag the card up or down. Or hover over the card, click , and select Move to top of column or Move to bottom of column.
-
To move an issue to another sprint, on the issue card, click → Add to sprint and select the one you need. How to use sprints
-
To delete an issue from the board, in the upper-right corner of the card, click and select Remove from board.
If you delete an issue from a project board, the issue will also be removed from the project's issue list. What is a project board
-
To edit parameters or comment on an issue, click the issue card.
Add a board to favorites
To always have quick access to a board, add it to your favorites. To do this, go to the board page and click the icon on the top panel of the page to the right of the board name.
To find your favorite boards, select Boards in the left panel and filter the board list by the Favorites value.
Configure issue cards
Customize the appearance of an issue card to see important parameters on the board or quickly find issues with specific tags and components.
By default, the issue card displays the values of the key, summary, assignee, and some other fields. To configure the fields displayed on the issue card:
-
On the board page, in the right corner of the search, sort, and group panel, click → Card fields.
-
Select the issue fields to be shown on the card. You can add any fields or remove already configured ones, except for the issue summary (the Issue field).
-
Click Apply.
-
To highlight specific issue tags or components with colors:
-
Set up the card to show the Tags or Components fields.
-
On the issue card, click the name of the tag or component and select a color.
The selected tag or component will be highlighted with this color on all cards.
-
Show the sprint issues
-
Open your board.
-
Click All issues on board.
-
Select the sprint whose issues you want to display.
By default, you can't view issues within a completed sprint. If you want to do this, first enable the sprint display. For more information, see View completed sprints.
Filter issues
If there are too many issues on the board, hide unnecessary ones using filters. You can choose a saved filter or create a new one. You can also apply several filters at the same time.
To create a filter on the board:
-
In the upper-right corner, click Filters. The filter setup panel will appear above the board columns.
-
Click the icon. Select the parameter to filter issues by and set its value.
Add multiple parameters to the filter if needed.
-
To cancel the filter, click Reset.
-
To save the filter, click Save:
-
Enter a filter name.
-
Select for whom the filter will be pinned at the top of the board for quick access: only for you or for all users. Pinned filters appear as buttons at the top of the board.
-
Click Save.
Saved filters are available to all users.
-
-
Saved filters can be pinned at the top of the board for quick access.
After creating a filter, you can only pin it on the board for yourself. For the filter to appear for all board users, you need to create it again.
-
In the filters panel, click or, in the upper-right corner of the page, click and select Manage filters.
-
Select the filters to be displayed on the board and click Apply.
-
-
To edit or delete a saved filter, in the upper-right corner, click and select Manage filters. Then, next to the filter name, click the icon.
Group issues
Issues on a board or in a backlog (see Backlog for details) can be grouped by a parameter. Each group appears as a horizontal lane with issue cards. In Kanban methodology, these are called swimlanes.
To group issues, click No grouping at the top of the board and select a grouping parameter (for example, Assignee). All issues that have the same value for the selected parameter will be combined into groups.
To change the display order of issues in a group, click Change order and reorder the parameter values as needed.
You can set the maximum number of issues per group:
- To the right of the group parameter value, click → Maximum number of issues.
- Specify the issue limit.
- Click Save.
You can add any issue to a group. To do this, click Add issue under the list of issues in the group. The new or existing issue will then have the field value that is used for grouping.
Limitations:
- When grouping by queue, only creating a new issue is available.
- When grouping by author, status, or type, adding an issue is not available.
Issues on a board or in a backlog can be dragged between groups. When moving, the issue will be assigned a new field value according to the grouping parameter.
Sorting issues on a board
Issues on a board can be sorted manually or by preset parameters, such as priority, deadline, or assignee. To sort issues, click Sorting at the top of the board and select the needed parameter from the list. Next to the sorting button, there is a button that allows you to control the sorting direction.
Bulk changes to issues
You can make bulk changes to issues on a board. Open an issue card on the board, click → Select, then click other issues on which you want to perform the same action. Once you select all issues, choose the appropriate action in the board's bottom panel:
- Move the issue up or down the column.
- Change the issue status.
- Move the issue to a sprint or backlog.
- Change the assignee or other issue parameters.
- Remove the issue from the board.
A sprint is a short work cycle in Agile, usually lasting 1–4 weeks. In Tracker, sprints are used on boards with backlogs and sprints. How to use sprints
A project is a set of issues from different queues where work is being done towards a common result. This could be launching a mobile app or redesigning a website's homepage.
A project helps you track: how many issues are done, how many are left, and whether the team is meeting deadlines. How to manage projects