Your first plugin in 5 minutes
Before you start developing a plugin, make sure that:
- The organization administrator has allowed plugin debugging. This toggle applies to all organization users.
- You've enabled debugging in Tracker: Settings → Experiments → Plugin debugging. This toggle enables debugging only for your account.
Without both settings, you won't be able to complete the development.
In short — what to do:
npm install -g @weavix/cli→weavix create→weavix debug→ open Tracker.
What we'll create
In 5 minutes, you'll create a working plugin that:
- Displays in the Tracker interface
- Uses Tracker's design system components
- Is ready for customization to fit your needs
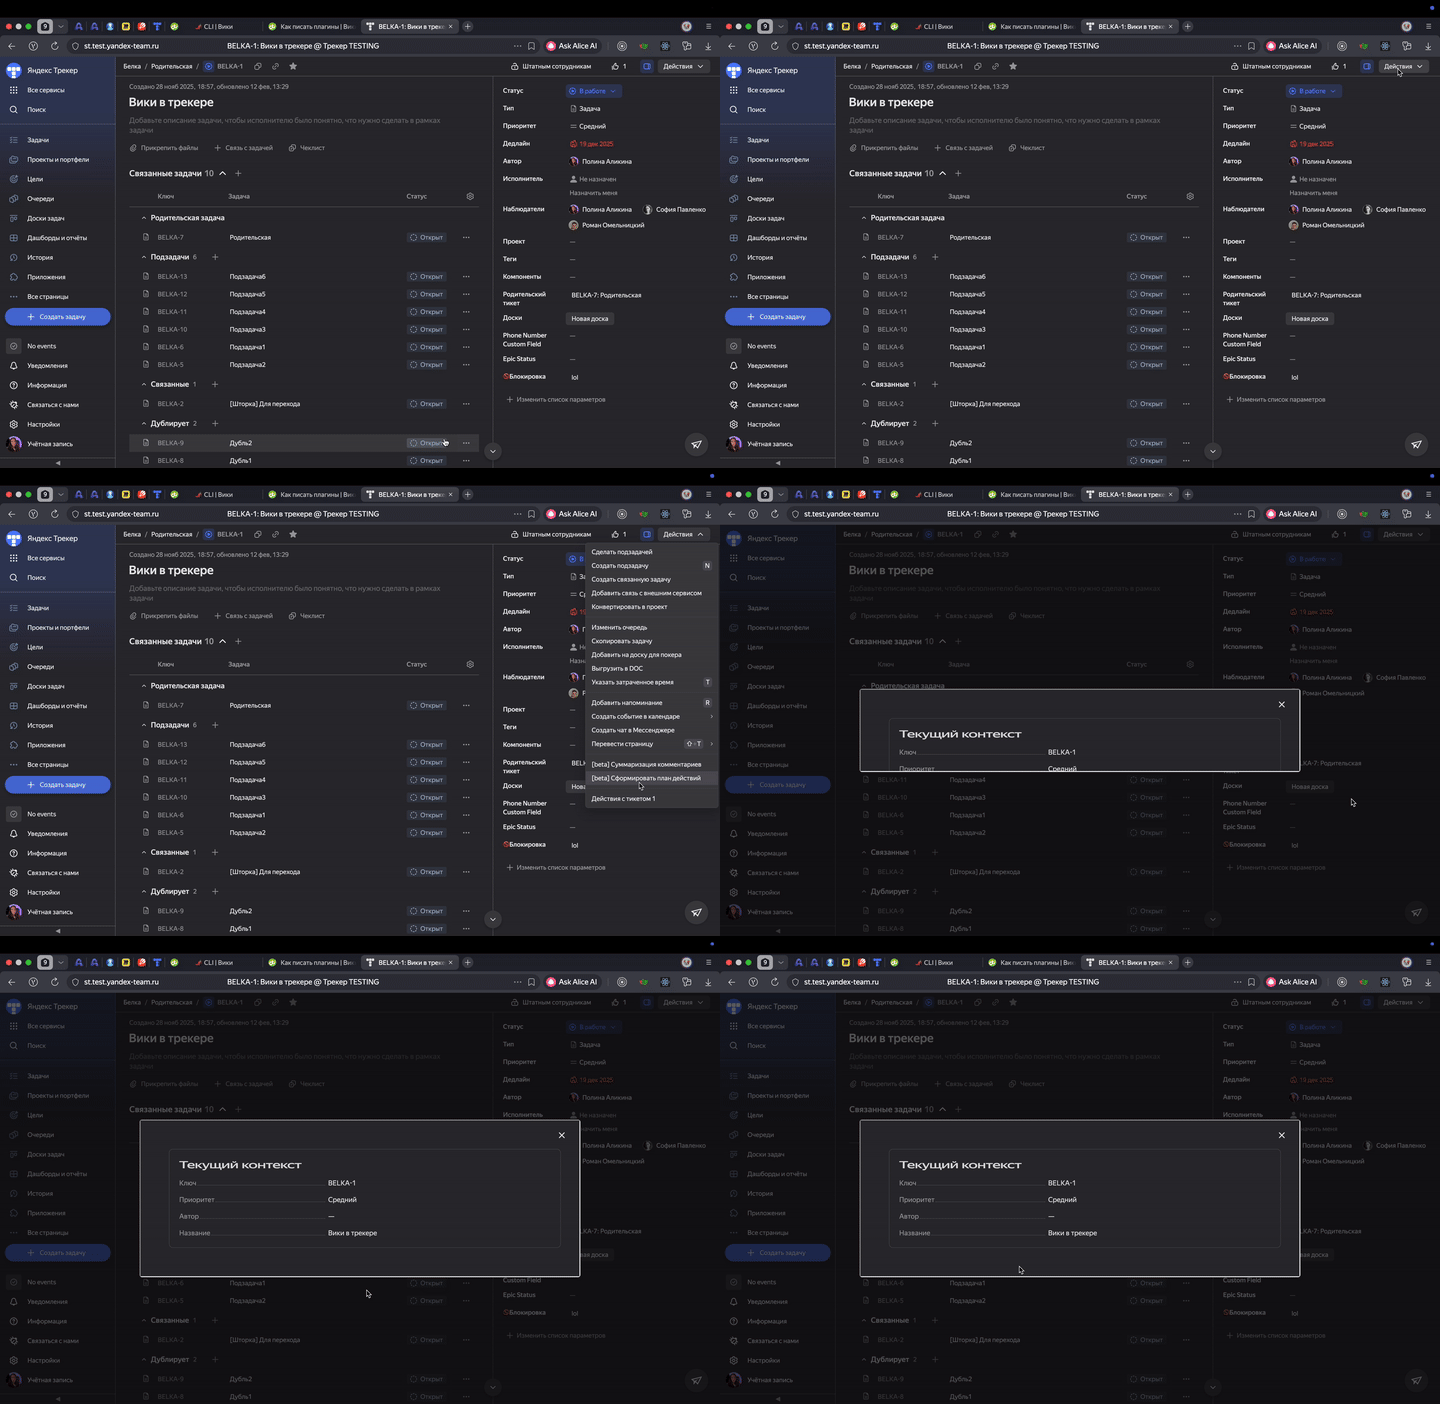
Step 1: Installation
You need to complete this step once before you start developing your first plugin.
-
Install Node.js version 22.16.0 or higher. To check the installed version, run:
node -v.On macOS and Linux, we recommend installing Node.js via nvm: this allows global package installation without
sudoand makes it easier to switch and update Node.js versions. On Windows, install Node.js using your preferred method or use a version manager for Windows. -
Install the CLI. To do this, run the following command in the command line:
npm install -g @weavix/cli
Step 2: Creating a plugin
In the command line, run:
weavix create
When running the command, answer a few questions:
- Template: choose one suitable for your slot, such as
issue.actionfor issue actions - Plugin ID: specify an identifier containing only lowercase letters, numbers, and hyphens
- Category: choose a category for displaying the plugin in the catalog. For the full list of categories, see the How to prepare a plugin for publishing page
- Permissions: select using the arrow keys and Spacebar
- Author/email: provide your contact details
Then run:
cd your-plugin-id
npm install
Step 3: Running and viewing
Run the command:
weavix debug
Open Tracker and in the menu select Settings → Experiments → Plugin debugging
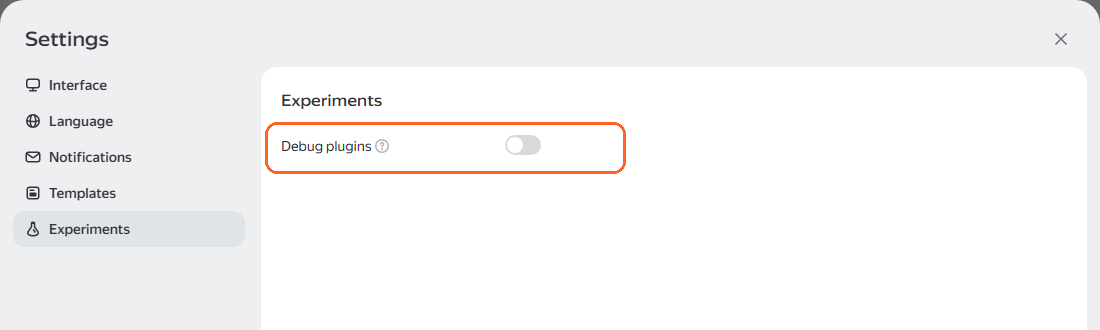
Debugging in the Safari browser is not supported due to browser limitations. Use another browser for debugging.
If debugging doesn't work, contact your organization administrator and ask them to allow plugin debugging. How to allow debugging
When you enable debugging, the browser may request permission for the site to access the local network. Allow access: without it, debugging won't work, because the config and plugins are loaded from localhost.
Find your plugin in the interface, in the location that matches the selected slot. Done.
Step 4: Publishing a plugin
When local development is complete, publish your plugin. For more information about publishing a plugin, see Preparing a plugin for publishing.
-
Before submitting the plugin for publication, prepare the images, description, and help.
-
Get a token by running:
weavix login. -
Run:
weavix submit— the command will automatically register the plugin if needed, upload the distribution, and submit the version for moderation. -
After submission, track the status using
weavix list.
What's next?
Editing
Open src/App.tsx — changes appear immediately. No restarts needed.
What's already set up
- React + TypeScript
- Gravity UI — design system components
- Yandex 360 theme — your plugin will look like part of Tracker
- SDK — for working with Tracker data via trackerApi
Code examples
The basic plugin structure is already in the files. You can find code examples on the Plugin platform questions page.
AI can help
All APIs are typed — AI can easily understand them. Here's an example of a working prompt you can use to create a plugin:
Write a plugin for importing issues into Tracker from a CSV file.
For interacting with Tracker, use the @weavix/tracker-plugin-sdk-react package, which has `trackerApi` — a client for the Tracker public API.
Need a form with:
- Search for the target queue to import into
- CSV delimiter selection
- CSV file upload
Then allow the user to map CSV fields to issue fields.
Also display import progress and results.
The plugin needs the navigation slot in the manifest, don't forget to add permissions for reading queues and fields, use the attached manifest schema.
Need help?
- Plugin examples — see what you can build
- API and SDK — how to work with Tracker data
- Slots and placement — where plugins can appear
- CLI commands — complete tool reference