How to connect a plugin from the catalog
A plugin is an extension that adds new features to Tracker that are not included in the standard set of capabilities. For example, a new interface element, an integration with an external system, or an AI assistant. With plugins, users can solve narrow or team-specific tasks on their own without waiting for the required features to be implemented in the Tracker service core.
Not only the Tracker team can create plugins for Tracker. Third-party developers can also create plugins for their organization's employees or add them to the public catalog to share their plugins with all Tracker users.
Find a suitable plugin
You can find and enable useful plugins in the catalog. Plugins are divided into categories, while search and filters help you find a solution for a specific task. The rating and number of installations show how popular the plugin is among other users.
Before connecting plugins, review the Terms of Use for the Yandex 360 services plugin catalog.
Before a plugin in the catalog becomes available for users to connect, the Tracker administrator must add it to the organization. If the plugin you need is not yet available, you can request its connection.
If there is no ready-made solution, you can develop your own plugin for your tasks: How to create a plugin
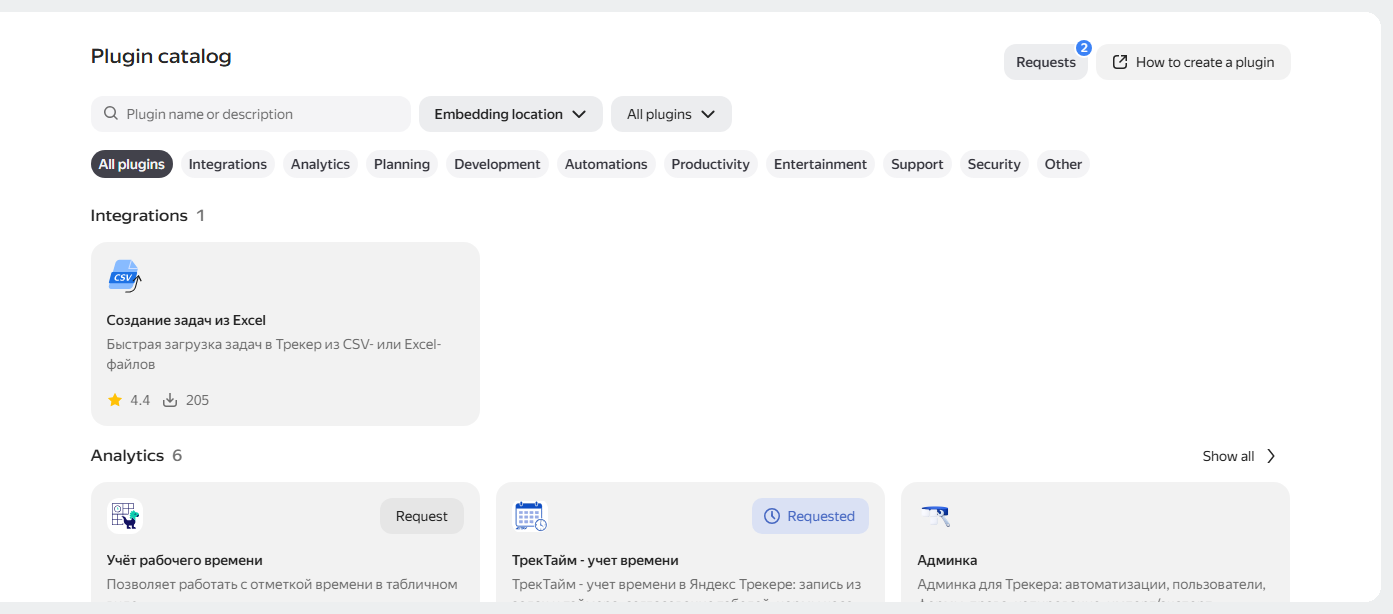
Plugin catalog
At what levels can you connect a plugin
Depending on the settings set by the Tracker administrator, the plugin can be connected at one of the levels:
-
For yourself — the plugin will only be available to the users who connected it, in their browser. Any employee can connect a plugin for themselves.
-
For a queue — if you are the queue owner or administrator, you can connect a plugin to it. The plugin will work in all issues of the selected queue and will be available to all team members.
The platform isolates plugins and limits their capabilities with the granted permissions. The plugin performs actions on behalf of the user and cannot access Tracker data that the user does not have access to.
How to connect
If the plugin has not been added to the organization yet, the Enable for me button is not available — instead, you will see the Request button. How to request a plugin connection
- In the left panel, select Plugins.
- At the bottom of the plugins page, click All plugins in the catalog.
- Find the plugin you need using search or in the list of categories.
- Open the plugin card.
- Click Enable for me.
The plugin is activated and ready to use in the Tracker interface.
You can also connect a plugin from the list: click the connection button on the plugin card.
You can only connect a plugin to queues where you have administrator rights. If the plugin is not yet added to the organization, you will see the Request button instead of the connection button. How to request a plugin connection
- In the left panel, select Plugins.
- At the bottom of the plugins page, click All plugins in the catalog.
- Find the plugin you need using search or in the list of categories.
- Open the plugin card.
- On the settings page, click Enable.
- In the window that opens, enter the name or key of the queue and select it from the list.
- Click Add.
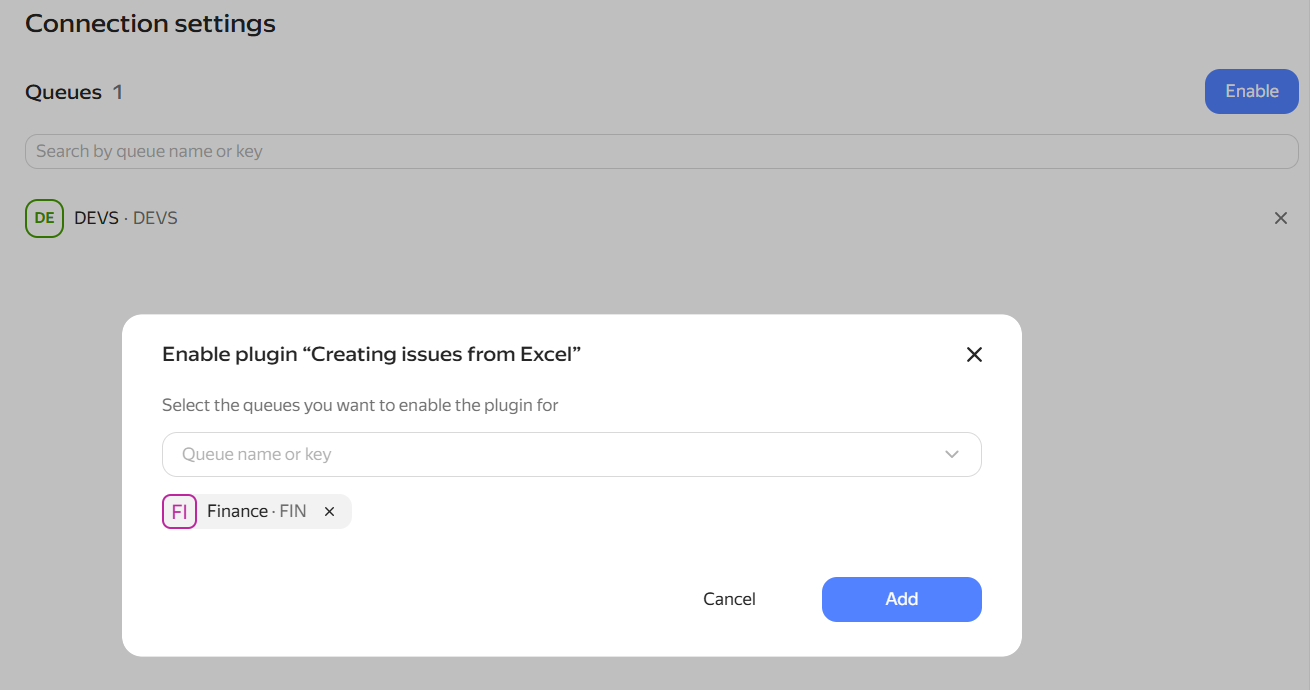
How to request a plugin connection
If the plugin you need is not yet added to the organization, request its connection from the Tracker administrator.
- In the left panel, select Plugins, then click Plugin catalog at the top of the page.
- Find the plugin you need using search or in the list of categories.
- Click the plugin card to open its page.
- Click the Request button.
- If necessary, add a comment for the administrator, for example, what task the plugin is needed for.
- Click Submit.
The plugin status will change to Requested, and the button will change to Request sent. You will receive a notification when the administrator reviews the request.
You can also click the Request button directly from the list without opening the plugin page.
How to disable
- In the left panel, select Plugins, then click All plugins in the catalog at the bottom of the page.
- Select the Connected for me filter.
- Find the connected plugin and open its card.
- Click Disable.
- In the left panel, select Plugins, then click All plugins in the catalog at the bottom of the page.
- Find the plugin and open its card.
- In the upper-right corner, click and select Settings.
- In the list of queues, find the queue you need and click the ✕ icon next to it.
How to write a review
Ratings and reviews from other employees are visible in the catalog and help you choose a proven plugin.
- In the left panel, select Plugins, then click Plugin catalog at the top of the page.
- Find the plugin you want to rate and open its page.
- Click Rate.
- Select the number of stars from 1 to 5 and add a comment if necessary.
- Click Rate.
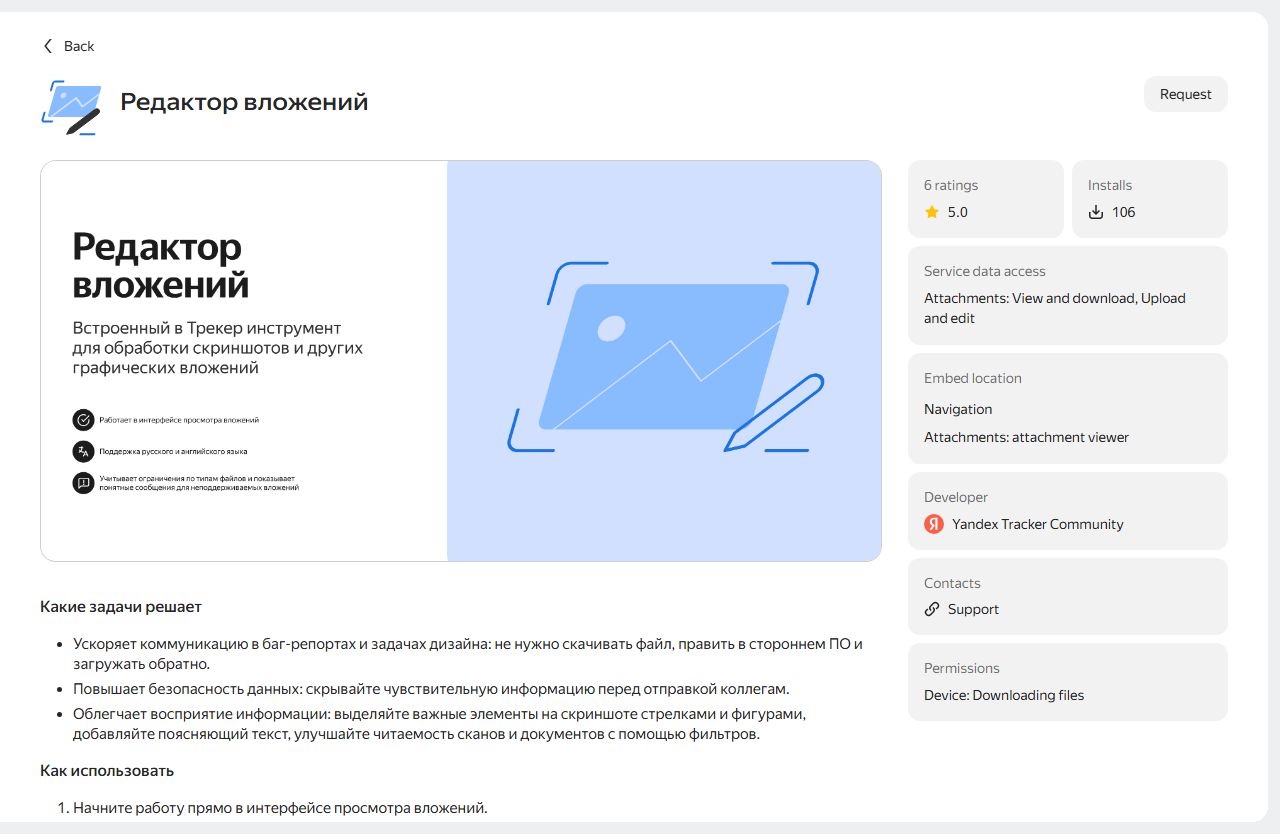
How to contact the plugin developer
- In the left panel, select Plugins, then click Plugin catalog at the top of the page.
- Find the plugin you need and open its settings page.
- On the right, find the Contacts block and click the link to send a message to the plugin developer.